Every year, I spend a whole afternoon with my mom trying to dye the perfect Easter eggs. I put jewels, glitter, and stickers. No two ever look alike. And every year, after I’ve put the most perfect finishing touches on them all, my mom takes them to the park and my family cracks them open and eats them without a second look!! And every year it drives me crazy! Well not this year!
I’ve been hallowing out eggs so after I put in the effort of beautifying them, I will wrap them up and store them away for safe keepings. Then next year I will get them out again and have them as decorations forever. I decided that I am going to start this new tradition of making one beautiful hallow egg a year, and someday I’ll be able to set out a whole basket full of beautiful handmade eggs. And the best part is they’ll never spoil!
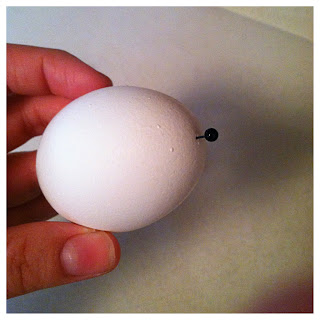
Hallowing out eggs is surprisingly easy. All you need is a pin, an exact-o knife, and a bowl to blow your egg into.
All you need is a single pin hole in the top of the egg. That’s it.
With your exact-o knife, you poke a tiny hole in the bottom of it. It doesn’t need to be big at all… maybe 1/8th of an inch. Then you just blow!
It just takes a little time, and a little patience to get all the egg out. Make sure you break up the yellow part with your pin. One egg takes 10 to 15 minutes, but it’s very worth the time and patience.
Once the egg is cleared out, run a little cool water into the egg, shake it up, and blow out the water. Repeat this step 2 or 3 times to make sure the egg is clean on the inside. Then leave it to dry over night. Then you're ready to decorate them!!
I found this great new technique called Leaf Print Eggs. I’m always a little leery when I see directions online. But this one worked great!! I tried it myself today, and I was absolutely thrilled with the results. Here’s the link I used.
http://spoonful.com/crafts/how-make-leaf-print-eggs
All it takes is Easter egg dye, pretty leaves, and a pair of nylons. I first dyed the egg a light yellow color that way my leaf print would be a different color underneath. I went out to my backyard and picked some shamrocks that were growing in my mom’s garden. I laid them on the egg. I found they laid better when then were a little but damp. Then I stretched the piece of nylon around the entire egg and secured it with a rubber band. Then I dyed the entire thing with the green dye. After that, I removed the nylon, peeled off the shamrocks and left it to dry.
Another great and easy way to embellish eggs is using stick on Jewels. They are so easy, and they look so elegant. They come in every color you can imagine. You can also cover up the holes you made to hallow the egg. To do this, you simply dye your egg a solid color. Then set it out to dry. Once it is completely dry, choose the jewels you want to put on the egg, and then stick them!
The possibilities of color combinations are truly endless!
Hope you feel inspired, and have a great week everyone
Xoxo
mandy


BEAUTIFUL! I feel inspired.
ReplyDelete